How to Create a Photo Wall Display Using Picture Frames
If you’re an avid photographer or simply like to surround yourself with lots of pictures, figuring out how to display pictures can be an interesting challenge. Hanging pictures in simple, boring rows doesn't do them justice, and it isn't always visually appealing.
But having a huge jumbled wall of framed art doesn't look great either. And the placement, oh, the placement; trying to measure a frame and lining it up on the wall or with other frames is like being back in 9th grade geometry class.
In order to make the best use of your wall space and to display your pictures to their best advantage, you need to plan out your display ahead of time. A unified photo wall display will make the best use of your wall space to display pictures, turning an entire room into a work of art. In order to create such a display, you need to do some planning and preparation ahead of time. Here are a few tips.
1. Unify Your Display Frames
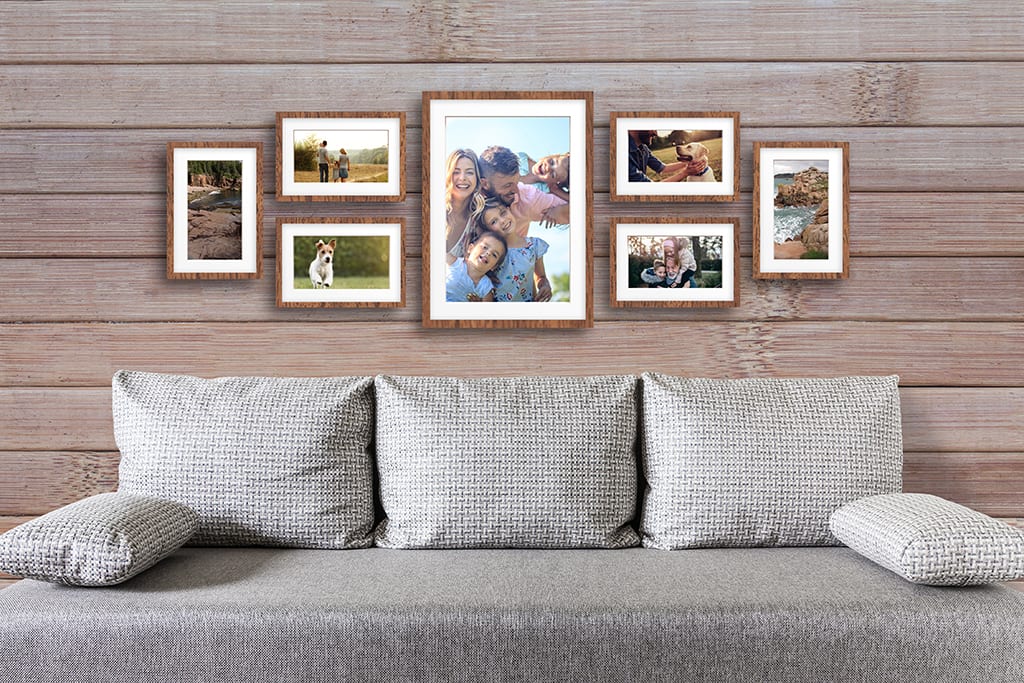
If you want your entire photo wall art display to look the most visually appealing, the frames you use for the display need to have a unified look as well. Unifying the look or color of the frames also allows the subject of the photo themselves to pop and be true stars of the show. A group of unique wood frames will make a great start as in the reference photo above that features our wood frame Profile 311 in brown or a group of sleek black frames.
Although matching frames are a good option, frames don't need to be identical in order to work in a photo display. It’s also okay to use existing frames, or if you enjoy collecting odd frames, they can become a creative part of your photo display. But a jumble of different frame styles and colors can look too random to form a cohesive display.
If you have a set of odd frames, consider painting them all the same color to create a unifying effect. If you don't want frames that look exactly the same, divide up your frames by color or material and look for sets that, while different, go well together.
A way to find frame groupings that work well when you don't have matching frames is by laying the frames out together on the floor in order to evaluate whether they work together. Rearrange them into different shapes and configurations and try pulling out or replacing frames until you are satisfied that you have a group of frames that all work together. Considering frames in this way can also give you a jump on the next step: deciding on your layout.
And don’t forget to include the fur-babies and your family's favorite places too in your family gallery.
2. Choose a Layout for Your Picture Wall Display

Before hanging anything on the wall, you need to decide on the configuration of your photos. The layout of your photo wall can be as simple or complex as you desire. You can also choose to hang photos very close together, with narrow spaces between frames, or more widely separated. Use these tips on how much spacing to include. The display options you choose will influence the look of the entire wall as well as of the individual pictures.
To try out a layout on your wall, use butcher paper, craft paper or even old wrapping paper to make a template of each frame. Simply lay each frame on the paper, trace around it, and then cut along the lines. You can tape these paper templates up on the wall to get a better idea about how a layout will look before committing to it (and without damaging your walls). When you have a layout you like, leave it in place for a day or two so you can get used to it and see if it still works.
3. Hang the Pictures
Once you’re happy with your layout, it's time to start hanging pictures. You can do it the traditional way with nails and other traditional hanging accessories, or if you don't want to fill your wall with nail holes, you can look for a creative way to hang pictures instead.
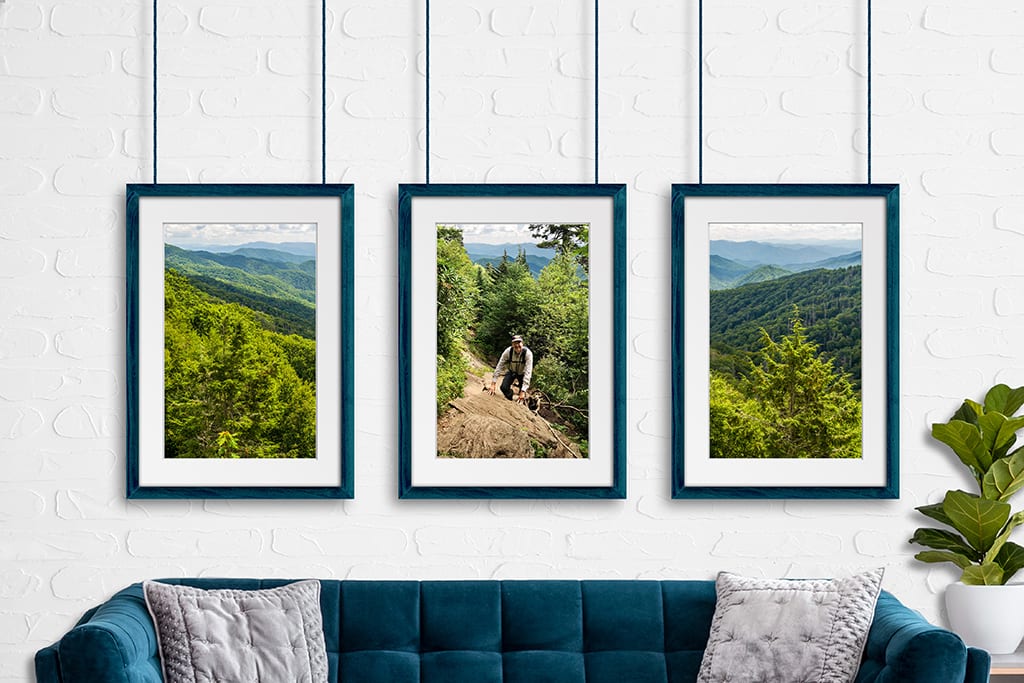
You can create a gallery-style hanging setup by installing wire close to the ceiling then using additional picture wires to suspend your art at the correct levels as in the reference photo above that features our wood frame Profile 311 in blue. Or you can use other materials to display your frames, like thin rails that can be installed for pictures to sit on or coat hooks that you can dangle small pictures from.
If you are creative, you can set up a unique display that won’t require lots of nail holes in your wall and that will showcase even more of your creativity in your unique photo display.
For a few bonus tips check out our post about the 7 Unspoken Rules for hanging picture frames.
Last Updated July 22, 2022